
How to Replace a Generator Spark Plug?
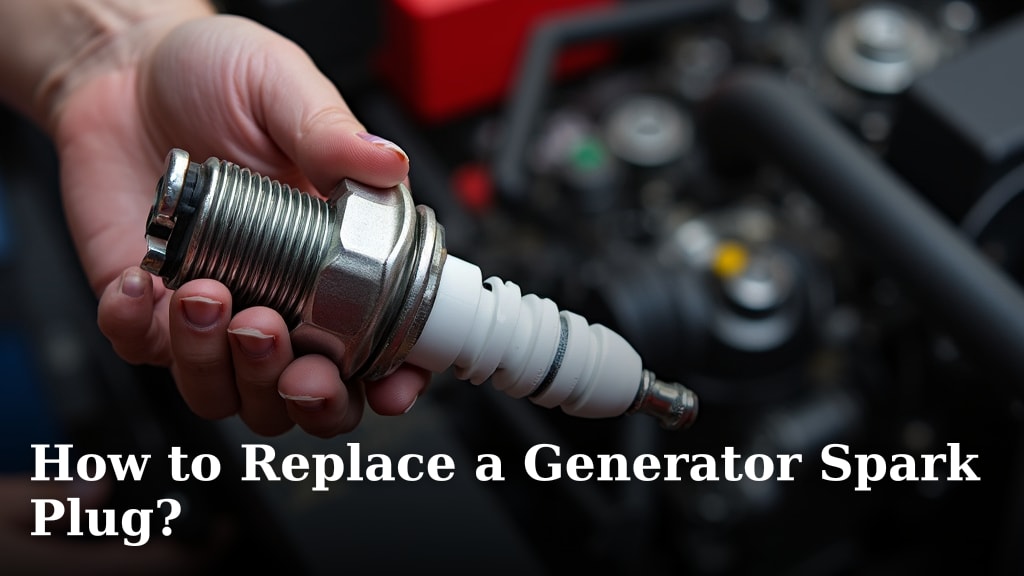
The easiest way to replace a generator spark plug is to first disconnect the spark plug wire, then remove the old plug with a spark plug wrench, and finally install the new spark plug by hand before tightening it. This simple maintenance step can keep your generator running smoothly.
You might be wondering if changing your generator’s spark plug is something you can do yourself. We found that most people can perform this task with basic tools and a little guidance. It’s a key part of your generator’s maintenance, ensuring it starts reliably and runs efficiently when you need it most.
- Safely disconnect the spark plug.
- Remove the old spark plug.
- Install the new spark plug correctly.
- Ensure proper gap and secure fit.
- Restore power and test your generator.
Let’s walk through exactly how to replace a generator spark plug step by step, so you can keep your power flowing.
Swapping Out Your Generator’s Spark Plug
Replacing your generator’s spark plug is a straightforward task that can save you a lot of hassle. Think of it like changing a lightbulb – a small part makes a big difference. We found that doing this regularly helps your generator start easily and run reliably, especially when you really need it.
Gathering Your Spark Plug Replacement Tools
Before you get started, it’s helpful to have everything laid out. This makes the job quicker and less frustrating. You don’t want to be halfway through and realize you’re missing something essential.
What You’ll Need
Here’s a quick checklist of the items you’ll want to have on hand:
- New spark plug (check your generator manual for the correct type and model)
- Spark plug wrench (sometimes called a spark plug socket, usually 13/16-inch or 5/8-inch)
- Gap gauge (if your new plug isn’t pre-gapped)
- Wire brush or clean rag
- Gloves (optional, but good for keeping hands clean)
- Safety glasses (always a good idea when working with tools)
- Dielectric grease (optional, for easier future removal)
Having these tools ready means you can focus on the task. It’s like a chef having all ingredients prepped before cooking – it makes the process smooth.
Safety First: Disconnecting Your Generator
Working with any engine requires caution. Your safety is the top priority. Many experts say that proper preparation prevents accidents (OSHA). Just as important as spark plug replacement, our guide to changing the oil in a dual fuel generator can help you keep your engine in top condition.
Essential Safety Precautions
Before you touch anything, always follow these steps:
- Turn off your generator completely. Make sure it’s not running and the engine is cool.
- Disconnect any power loads. Unplug anything that might be connected to the generator’s outlets.
- Remove the key. If your generator has an ignition key, take it out and put it in your pocket.
- Let it cool down. A hot engine can burn you. Give it at least 15-20 minutes after shutting down.
These steps might seem obvious, but they are critical. Think of it as putting the car in park before getting out – it’s just good practice.
Locating and Removing the Old Spark Plug
Now that your generator is safe and cool, you can find the spark plug. It’s usually easy to spot.
Finding the Spark Plug
The spark plug is typically located on the cylinder head of the engine. You’ll see a thick, rubbery wire leading to a ceramic insulator. That’s your spark plug wire, and it connects directly to the plug. Sometimes it might be tucked away, but generally, it’s quite accessible.
Disconnecting the Spark Plug Wire
Gently but firmly grasp the rubber boot of the spark plug wire. Pull straight back to remove it from the spark plug terminal. Avoid pulling on the wire itself, as this can damage the internal connection. If it’s stuck, a slight twist can help loosen it.
Unscrewing the Old Plug
Once the wire is off, grab your spark plug wrench. Fit the wrench over the old spark plug. You’ll need to turn it counter-clockwise to loosen it. The first turn might require a bit of force, as plugs can tighten over time. Be steady and don’t force it too much. Once it breaks loose, it should turn easily by hand or with the wrench until it comes out completely.
Take a moment to inspect the old plug. Its condition can tell you a lot about your engine’s health. Is it black and sooty? Oily? White and chalky? This can indicate other issues, but for now, we’re just replacing it.
Preparing and Installing Your New Spark Plug
With the old plug out, it’s time for the new one. This is where you ensure everything is set for optimal performance.
Checking the Spark Plug Gap
Most new spark plugs come pre-gapped, but it’s always a good idea to double-check. Your generator’s manual will specify the correct gap distance. Use a gap gauge to measure the distance between the center electrode and the ground electrode. If it’s off, you can carefully bend the ground electrode slightly to adjust it. Too wide or too narrow a gap can cause misfires or poor performance.
Installing the New Plug by Hand
This is a crucial step. Start by threading the new spark plug into the engine’s cylinder head by hand. Turn it clockwise. You want it to go in smoothly without any resistance. If it feels like it’s cross-threading or sticking, stop immediately and try again. Cross-threading can damage the engine’s cylinder head, leading to very costly repairs. It should turn several rotations easily.
Tightening the Spark Plug
Once you can no longer turn the plug by hand, use your spark plug wrench to tighten it. The general rule is to tighten it about 1/4 to 1/2 turn past finger-tight. You don’t want to overtighten it, as this can strip the threads or crack the spark plug’s ceramic insulator. Some spark plugs have a crush washer; if so, you’ll feel it compress as you tighten. A snug fit is what you’re aiming for – not extreme force.
Here’s a quick guide for tightening:
| Spark Plug Type | Tightening Past Finger-Tight |
|---|---|
| With Gasket/Crush Washer | 1/4 to 1/2 Turn |
| Tapered Seat (No Gasket) | 1/16 Turn (just a snug twist) |
Consult your generator’s manual for specific torque specifications if you have a torque wrench, but for most DIYers, the “snug then a quarter turn” method works well.
Final Steps: Reconnecting and Testing
You’re almost done! Just a couple more things to do before you can pat yourself on the back.
Reattaching the Spark Plug Wire
Push the spark plug wire’s rubber boot firmly back onto the new spark plug terminal. You should feel a click or a definite seating sensation. Give it a gentle tug to ensure it’s securely attached. A loose connection can lead to misfires or the engine not starting at all.
Starting Your Generator
With everything reconnected, it’s time for the moment of truth. Reinsert the key if you removed it, and try starting your generator. It should start more easily and run more smoothly with the new spark plug. Listen for any unusual noises and check for steady operation. If it starts, great job! Let it run for a few minutes to ensure everything is working correctly.
If it doesn’t start, double-check your connections and make sure the plug is fully seated. Sometimes it’s a simple oversight. We found that most starting issues after a plug change are due to a loose wire or an incorrectly gapped plug.
Conclusion
You’ve now got all the knowledge and steps to confidently replace your generator’s spark plug. It’s a small task that makes a huge difference in how your generator performs, ensuring it’s always ready when you need it most. By following our guide, you can avoid frustrating no-starts and keep your power flowing smoothly.
Remember, a little routine maintenance goes a long way. So, grab your tools, double-check your manual, and give your generator the attention it deserves. You’ll enjoy reliable power and peace of mind for seasons to come! For comprehensive guidance on maintaining your generator, explore our article on what is needed for safe operation of a dual fuel generator.
Frequently Asked Questions
How often should I change my generator’s spark plug?
Most manufacturers recommend replacing your generator’s spark plug annually, or every 100-300 hours of operation. If your generator sees heavy use, or if you notice starting issues, it’s wise to check and replace it more frequently. We found that regular changes prevent many common generator problems.
What happens if I don’t change my generator spark plug?
An old or fouled spark plug can cause several issues. You might experience hard starting, misfires, reduced fuel efficiency, or even a complete failure to start. Over time, a neglected spark plug can also put extra strain on other engine components, potentially leading to more expensive repairs. It’s a small part with a big job!
Can I clean my old spark plug instead of replacing it?
While you can temporarily clean a spark plug with a wire brush to remove carbon buildup, it’s generally best to replace it. Cleaning won’t restore the plug to its original performance. The electrodes wear down over time, affecting the spark quality. We recommend replacement for consistent, reliable operation.
What’s the right way to dispose of an old spark plug?
Old spark plugs are typically considered general waste and can be disposed of in your regular trash. They don’t contain hazardous materials in quantities that require special disposal. However, if you’re concerned, you can always check with your local waste management services for specific guidelines in your area.
My generator still won’t start after changing the spark plug. What could be wrong?
If your generator still won’t start after a new spark plug, first re-check that the spark plug wire is securely attached and the gap is correct. Other common issues include stale fuel, a clogged fuel filter, a dirty air filter, or a faulty carburetor. We recommend checking these other maintenance items or consulting your generator’s troubleshooting guide.
