Clean Your Entire Home: A Comprehensive Spring 2026 Guide

The easiest way to clean your entire home is to approach it room by room, using a top-to-bottom, left-to-right strategy. This ensures you don’t miss spots and avoids re-cleaning areas you’ve already finished. Start with decluttering to make the actual cleaning much faster and more effective.
Getting your whole house sparkling can feel overwhelming, but breaking it down makes it totally doable. Think of it as a marathon, not a sprint. We found that having a clear plan and the right cleaning supplies makes all the difference. It’s about making the process manageable so you can enjoy a fresh space.
- Start with decluttering every room.
- Tackle one room at a time.
- Clean from the top down and left to right.
- Gather all your cleaning tools first.
- Schedule cleaning sessions if needed.
Ready to make your home shine? Let’s walk through exactly how to get every corner of your house looking its best, step by step.
Your Plan for a Spotless Home: A Room-by-Room Guide
Getting your entire home clean might sound like a huge project. But you can do it! The key is a smart strategy. We’ve found that cleaning one room at a time makes it much less overwhelming. You’ll feel a sense of accomplishment as you finish each space.
Prep Work: The Secret to Easier Cleaning
Before you even grab a sponge, let’s talk about getting ready. This step makes actual cleaning go much faster. You want to clear the clutter first. Imagine trying to clean a table piled with mail and magazines. It’s nearly impossible!
Decluttering Your Spaces
Walk into each room and look around. What items aren’t in their proper place? Gather these items. Think about putting them back where they belong. Or, if an item is no longer needed, consider donating or discarding it. Many organizations can take gently used items. This pre-cleaning step is incredibly important.
Gathering Your Cleaning Arsenal
Having all your supplies ready saves you time. You won’t be hunting for a spray bottle mid-task. What do you need? Most rooms benefit from
- All-purpose cleaner
- Glass cleaner
- Microfiber cloths (different colors for different tasks is helpful!)
- Sponges
- Paper towels
- Trash bags
- Vacuum cleaner or broom and dustpan
- Mop and bucket
- Rubber gloves
Research shows that using the right tools can make cleaning tasks up to twice as fast (Good Housekeeping Institute). Having everything in one caddy or basket makes moving from room to room a breeze.
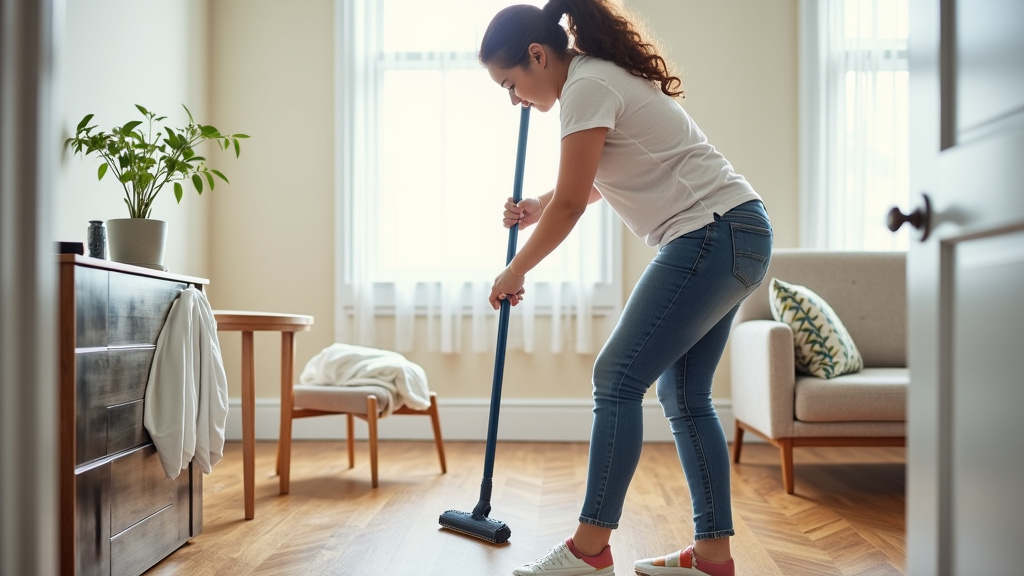
The Top-to-Bottom, Left-to-Right Method Explained
This is the golden rule for efficient cleaning. You always start from the highest point in the room and work your way down. Why? Because dust and debris fall. If you clean your floors first, you’ll just be dusting them again later.
Similarly, you want to clean from left to right (or right to left, just pick a direction!). This helps ensure you don’t miss any spots. You move around the room in a systematic way. It’s like painting a wall; you work in sections.
Kitchen: Tackling the Heart of the Home
The kitchen is often the busiest room. It needs a thorough cleaning. Let’s start with the surfaces and appliances.
Countertops and Sink
Clear everything off your countertops. Wipe them down with your all-purpose cleaner. Pay attention to any sticky spots or spills. Next, tackle the sink. Scrub it well to remove any grime or food particles. Rinse it thoroughly. A clean sink makes the whole kitchen feel fresher.
Appliances: Inside and Out
Your microwave can get messy quickly. Wipe down the inside, including the turntable. For the exterior, use an appropriate cleaner for the finish. Stainless steel appliances often need a special cleaner to avoid streaks.
Don’t forget the refrigerator. Pull out old food. Wipe down shelves and drawers. Many experts recommend cleaning out your fridge weekly to prevent food waste and odors (USDA). The exterior also needs a wipe-down.
Consider cleaning your dishwasher filter. Clogged filters can lead to poor cleaning. You can usually find instructions in your appliance manual.
Stovetop and Oven
The stovetop can collect grease and food splatters. Use a degreaser if needed. For the oven, if you have a self-cleaning function, now is a good time to use it, following your oven’s instructions carefully. Otherwise, a good oven cleaner will do the trick. Remember to ventilate the area well when using strong oven cleaners.
Floors
Finally, sweep or vacuum the kitchen floor. Then, mop it. Start from the farthest corner of the room and work your way towards the door. This way, you don’t have to walk over your freshly cleaned floor.
Bathroom Bliss: Creating a Fresh Oasis
Bathrooms require special attention due to moisture and hygiene concerns. Let’s get yours sparkling.
Toilet and Shower/Tub
Start with the toilet. Apply toilet bowl cleaner and let it sit for a few minutes. Scrub the inside with a toilet brush. Wipe down the exterior, including the tank, handle, and base. Many public health guidelines recommend cleaning the toilet at least weekly (CDC).
Next, the shower or tub. Spray down the tiles and tub with a bathroom cleaner or a solution of vinegar and water. Let it sit to tackle soap scum and mildew. Scrub with a brush or sponge. Rinse everything thoroughly. Don’t forget to clean the shower head and faucets.
Sink and Vanity
Clear the vanity counter. Spray and wipe down the surface. Clean the sink basin and faucet. A toothbrush can be great for getting into tight spots around the faucet handles.
Mirrors and Fixtures
Use glass cleaner on mirrors. Wipe them with a microfiber cloth for a streak-free shine. Also, clean any light fixtures or cabinet pulls.
Bathroom Floors
Sweep or vacuum the floor. Then, mop it. Use a bathroom-specific cleaner or a general floor cleaner. Again, work from the farthest corner out to the door.
Living Areas: Bedrooms, Living Room, and Dining Room
These areas are all about comfort and presentation. Let’s refresh them.
Dusting is Key
In these rooms, dusting is your primary focus. Start high! Dust ceiling fans, light fixtures, and the tops of shelves. Then work your way down. Dust picture frames, furniture, and electronics. Use a damp microfiber cloth to trap dust instead of just moving it around.
Windows and Mirrors
Clean any windows and mirrors in these rooms. Use glass cleaner and a lint-free cloth. Wipe in a pattern to avoid streaks. Clean window sills and tracks too.
Upholstery and Fabrics
Vacuum furniture, including under cushions. For fabric spills or spots, spot clean according to the fabric care instructions. Many experts suggest vacuuming upholstery every few months (National Sleep Foundation, for general home hygiene advice).
Floors, Again!
Vacuum carpets and rugs thoroughly. For hard floors, sweep and then mop, following the top-to-bottom, left-to-right rule.

Bedroom Specifics: Creating a Restful Retreat
Your bedroom should be a sanctuary. Let’s make it feel that way.
Bedding Care
Wash your sheets, pillowcases, and duvet covers regularly. Many health organizations recommend washing bedding weekly in hot water to kill dust mites and allergens (American Academy of Allergy, Asthma & Immunology). It’s a simple step that makes a big difference to your sleep environment.
Under the Bed and In Closets
Don’t forget to check under the bed for dust bunnies. Tidy up your closets. Organize clothes and other items. A decluttered closet can make getting ready in the morning much easier.
Putting It All Together: Your Cleaning Checklist
Feeling motivated? Here’s a quick checklist to keep you on track:
- Declutter each room completely.
- Gather all your cleaning supplies.
- Clean one room at a time, top to bottom, left to right.
- Wipe down kitchen appliances and counters.
- Scrub the bathroom fixtures and surfaces.
- Dust all surfaces in living areas and bedrooms.
Remember, a clean home isn’t just about appearances. Research indicates that a tidy environment can contribute to improved mood and reduced stress (McMaster University). So, you’re not just cleaning; you’re creating a healthier, happier space for yourself.
Conclusion
You’ve learned that a clean home is totally achievable with a smart, room-by-room strategy. Remember to declutter first to make cleaning a breeze. Then, apply the top-to-bottom, left-to-right method in each space for maximum efficiency. Gathering your cleaning supplies beforehand is a game-changer. You’ve got this! Your next step is to pick one room and start implementing this plan today to enjoy your refreshed living space.
Frequently Asked Questions
How often should I deep clean my entire house?
Deep cleaning your entire house typically needs to happen every few months. However, this depends on your lifestyle and how much use each room gets. Consistent daily or weekly tidying will make these deeper cleans much more manageable.
What’s the best way to organize my cleaning supplies?
We found that keeping all your cleaning tools in one place makes a big difference. Use a cleaning caddy or a sturdy basket to hold your most-used items like sprays, cloths, and sponges. This makes it easy to carry everything from room to room.
Is it really necessary to declutter before cleaning?
Yes, absolutely! Decluttering is a critical first step that saves you a lot of time and effort. It allows you to clean surfaces and floors effectively without having to move piles of items around.
How do I deal with stubborn grime in the kitchen?
For tough kitchen grime, like baked-on food or grease, try a degreaser or a paste made from baking soda and water. Let it sit for a bit before scrubbing. For appliances, check your owner’s manual for specific cleaning recommendations.
What if I don’t have much time to clean?
If time is short, focus on high-impact areas first. Tackle the kitchen counters, bathroom sink, and entryway. Even 15-20 minutes of focused cleaning can make a noticeable difference. Breaking tasks down into smaller, daily habits also helps.